Do this and get your solo show or cabaret booked!
The most valuable thing you can do to help book your solo show or cabaret consistently, I believe, is to record testimonials from audience members after each of your performances and cut them into a short trailer. What producers and bookers want to know if they are going to consider booking you and your play is whether or not your play is any good. And a video trailer with audiences saying how much they enjoy your play and work immediately gives them social proof that your play is good.
You can then pitch that trailer to festivals, other theaters, and producers to encourage them to book your show. Everyone today needs content, and if your play is excellent and relevant to what that theatre or organization likes, why would they not want to book you? What you are doing is creating your reviews to share with them, but in a video format. And as they say, if a picture speaks a thousand words, a video must speak ten thousand words.
The biggest mistake I feel actors make when promoting their solo shows and or cabaret shows is hiring someone else to do it for them. If you are always paying someone to edit your trailer, you are still dependent on their schedule, and speed is always the name of the game, not to mention how incredibly expensive it is to hire an editor. Every time you want a show edited, you’re going to be dropping $200 to $400. And with a little elbow grease, you can learn how to use your talents and creativity to move your show forward. And let’s be honest, no one will care for your show as much as you will.
Technology can seem crazy intimidating, but facing it and tackling it one step at a time, will give you the confidence to feel you have control over your career. It will allow you to have the courage to feel inspired to create all sorts of content. Technology is like learning a hard piece of text, it’s intimidating at first, but once you tackle it bit by bit, you gain the ability to handle it with confidence. Every piece of technology you teach yourself now will pay you back ten folds in the future. YOU CAN DO IT!
Eat the elephant one bite at a time.
Below I have shared the equipment I use and my process that I go through when I record my video testimonials.
Tools:
A fast depiction of what this blog post shares.
The CameraS
Canon
I still use the same camera today as when I first started performing my solo show about seven years ago to record my audience testimonials - a Cannon 720 camcorder. Today I use the newer model- the Canon VIXIA HF R800. The new model will run you around $225, and you can probably get a used one or older version on eBay for about $100 or even less. A used one will be fine if you are trying to save a few bucks.
Mobile Phones
You can also use your mobile phone, and today’s mobile phones are amazing. We all know how far phones have come in the seven years, and video and storage capacity on our phones have come even further. Today your phone will allow you to record in 2K or 4K resolution, which is an insanely high resolution. Resolution means how sharp and clear a moving picture looks. A Netflix film is shot in 4K, and some are even in 2K, and most YouTube videos are in 1080 x 1920, which isn't even 2k.
So that should tell you how powerful your iPhone or mobile phone is today. Steven Soderbergh is even shooting experimental films with his iPhone. They are crazy good.
HOW TO SET YOUR PHONE TO RECORD in 2K or 4K


Recording in High Resolution
If you use your mobile phone, set it to 4K at 24 fps (frames per second) so that you get that excellent resolution, but once you are done, be sure to set it back to 720 so that your memory/storage doesn’t get eaten up. The higher resolution, the more memory it eats up.
Transfer off Your Computer
Be sure to transfer all of your video footage to an external hard drive and work off of it (don’t leave it on your computer or your phone). By transferring your files onto an external drive, you will save the hard drive on your computer and not destroy your memory space. (If you use a Mac and your noticing that you’re getting that little colored beach ball all the time, your hard drive is too full. You have too many videos and too many images that are eating up your hard drive. Move them over to an external drive).
IMPORTANT NOTE: When you use your iPhone, be sure to record in Landscape, never vertical. You want the widest angle possible so that you can have the proper aspect ratio. All that means is when people see your video if it fits the entire screen. But you can crop it in vertical to fix this, but your clip will be on a very tight shot is all.
The DRIVES
I use an external drive called WD, and I have about five of them for all of my editing needs - but you only need one. They are easy to use and incredibly dependable. Drives today are getting less expensive by the day and can store so much more memory. Seven years ago, an external used to be almost the size of your Mac laptop, today they are the size of your mobile phone. Go to any technological store in the city like Best Buy, B & H, Target, and they will have a technician that can help guide with any questions you might have. The stuff you are dealing with is very basic, and they can quickly help you get set up. YOU CAN DO THIS!
Off Your Phone:
If you use your phone to record the testimonials, you can buy a portable drive like a San Disc iXpand Flash Drive that you plug into your phone, and can share your video and jpeg image files off your phone and onto that drive. Then you take that flash drive and plug it into your external drive like the WD external hard drive and transfer all the files off your phone onto that drive so that you can cut begin to cut your trailer.
You are going to cut your trailer by importing those files on your computer and then using iMovie or whatever video software you are going to use to cut your trailer in. You only want to store your video files on your external hard drive, and not storing them on your computer and or mobile phone. Be sure to delete all your files off your mobile phone to save your memory. This can be done with an iPad as well, but you will need a specif tripod for it, but the process for the iPad is the same as it is for an iPhone. It all sounds complicated, but it is NOT, and once you do it once, you will know how to do it.
Off the Canon Camcorder
The Canon camera has a small microchip that holds all the data you record, which allows you to transfer those files from the camera to your computer and or external hard drive. I suggest than once you get them on your computer, move them asap over to your external hard drive to save your computer's memory and to stay organized.
The Edit Process
iMovie is the standard video software that comes will all Apple devices; it’s even on your iPhone. If you use a PC, there is plenty of excellent editing software that you can use - Sony Vegas is great for PC and is what I learned how to edit on. Again, I strongly advise you NOT to hire someone to do all of this for you. You can do this!
Cutting with iMovie
Below I have attached all the main tools you will need to edit and export your trailer. You will feel intimidated when you first try this, but you quickly figure it out, and then on your next go around, you will be faster and have more confidence with these skills. YOU CAN DO IT!
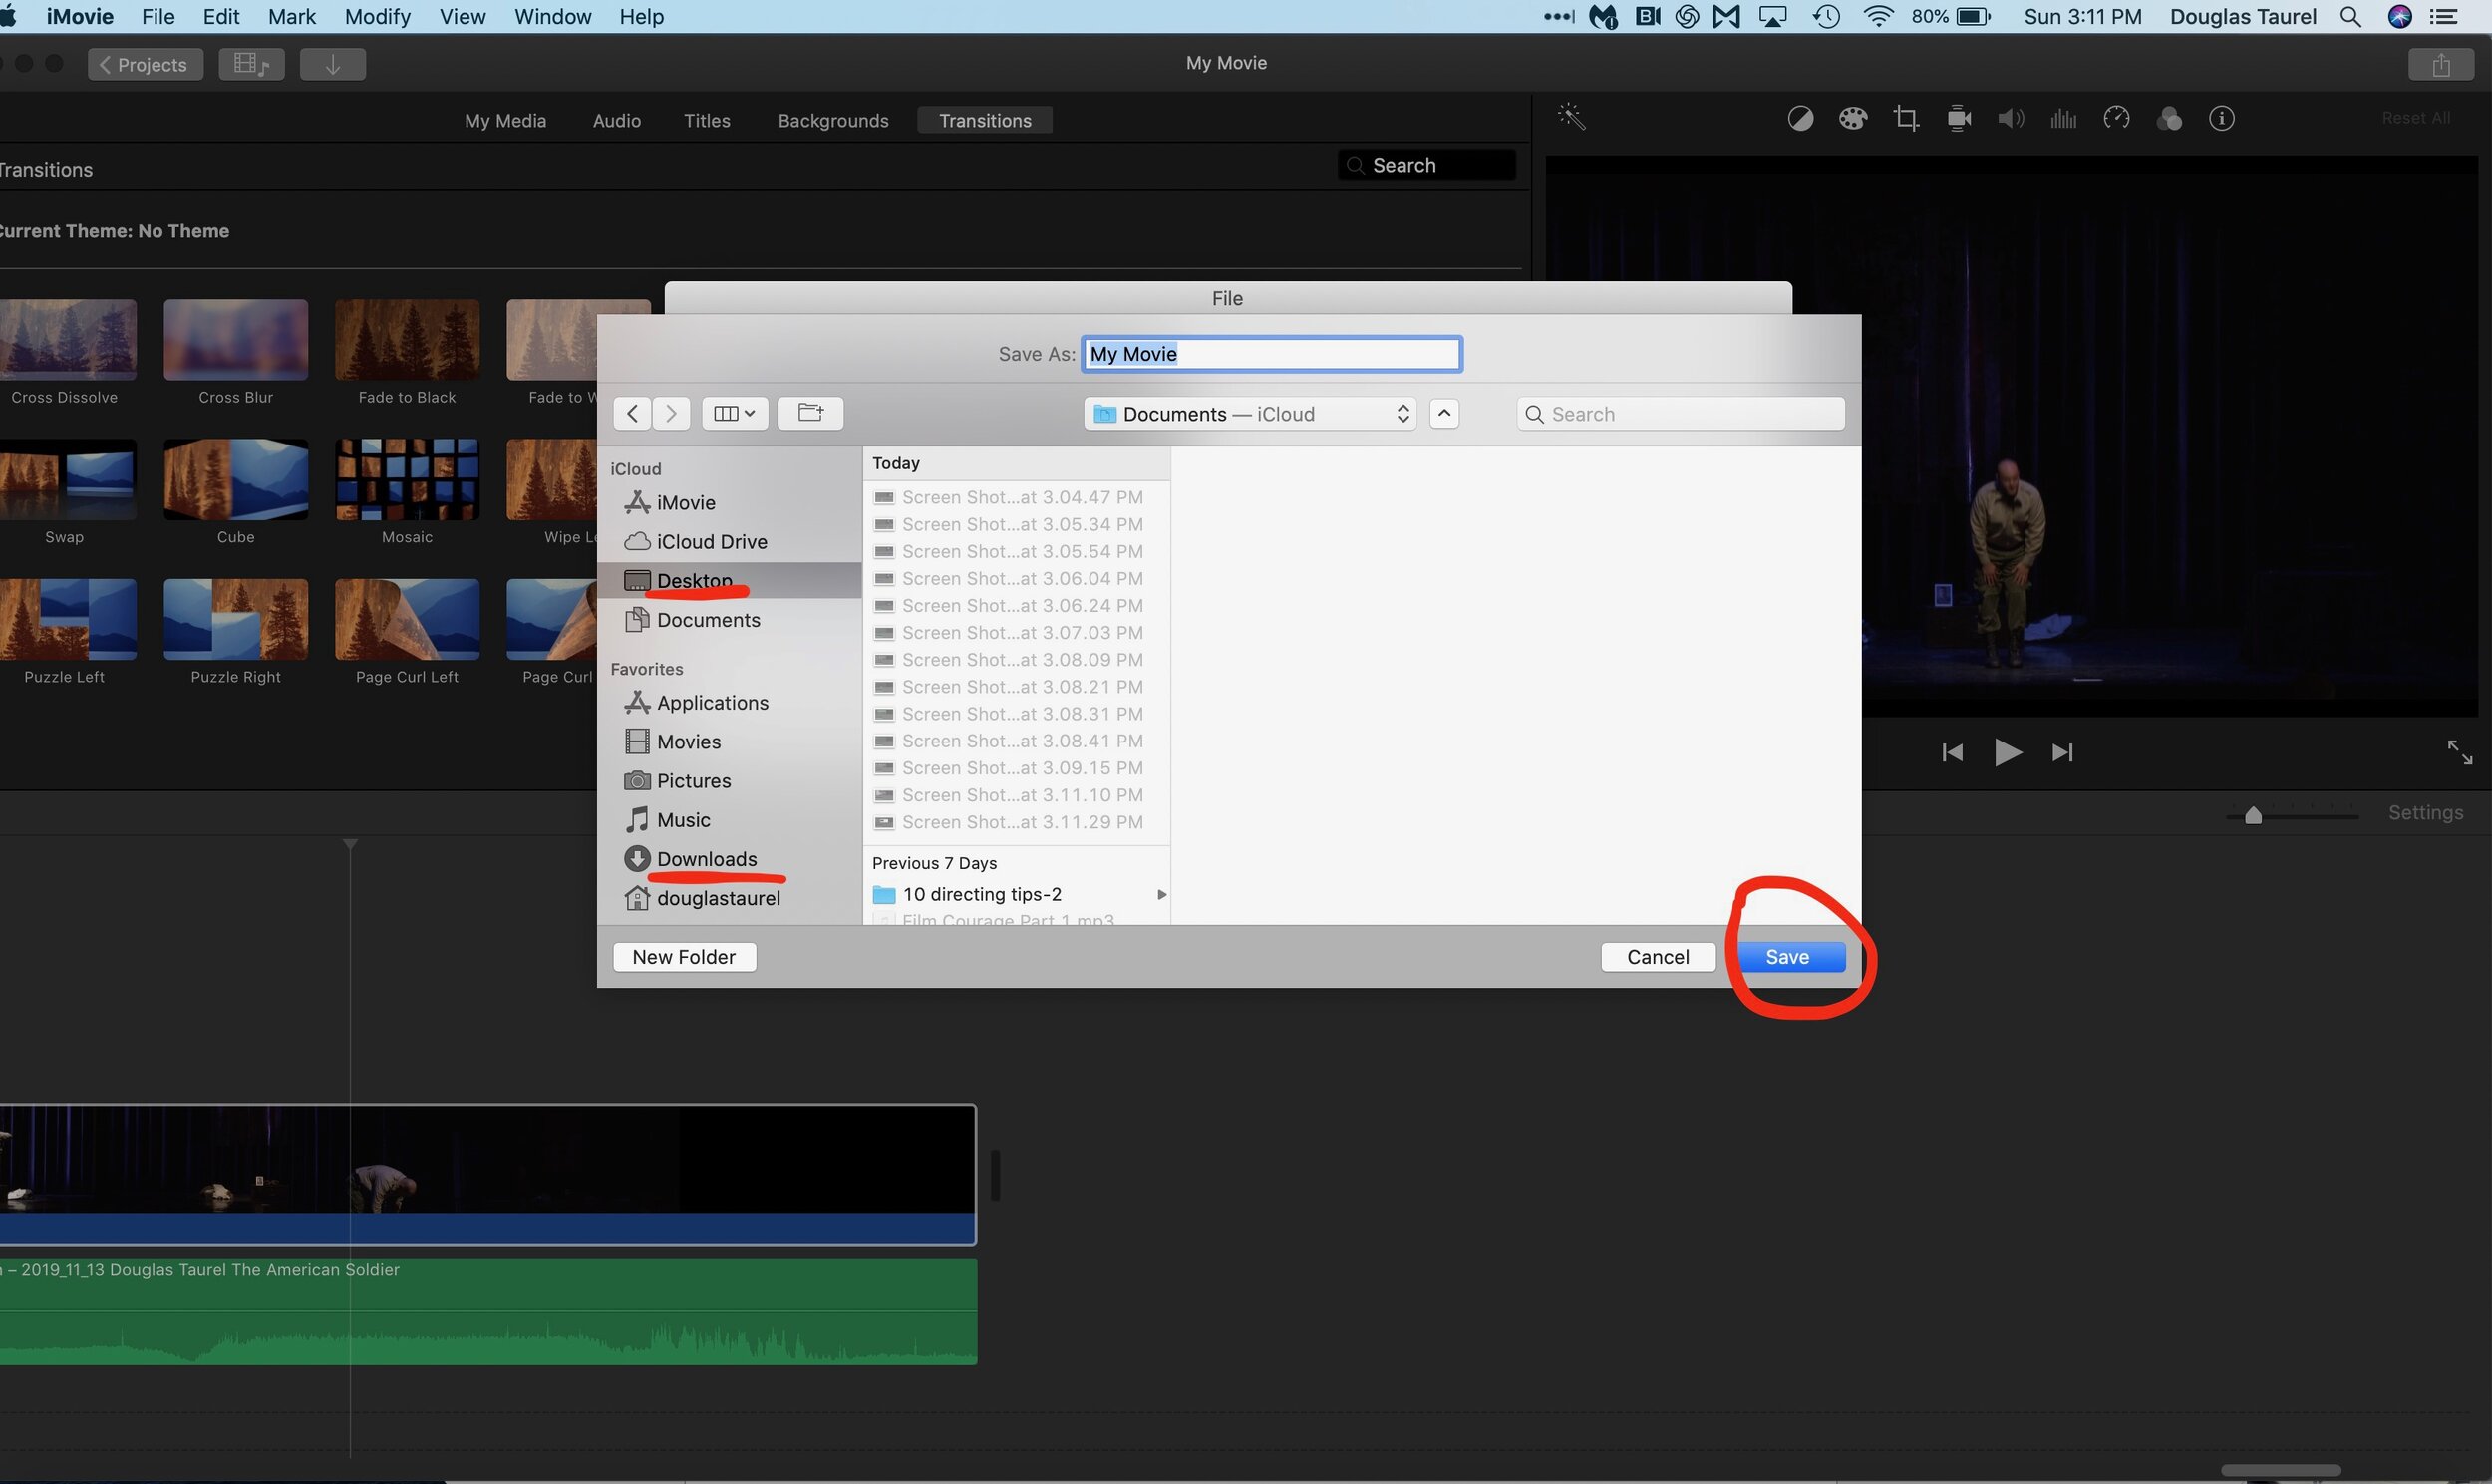
CREATING THE PROJECT
Once you have your footage on your drive, open iMovie, choose “New Movie” and drag your footage into the timeline to cut your testimonials in the trailer. Once you select “New Movie”, give it a name and where you see My Movie in Step 3, that is where the name of your project that you give it will be seen.


Dragging and Shrinking the Footage
Put your curse at the end of the clip and drag in to stretch it and make it longer, or pull in to make it shorter. The more detailed you want to be, the longer you want the clip to be in the timeline.
You can also stretch or compress the clip by using the small draft feature on the upper middle right.

Cutting Your Clips
Place the mouse where you want the clip cut, and double click the mouse to see the cut option.

Detaching the Audio
The reason you Detach the Audio from the clip is to either cut some of it away to add music or different sections to the video clip. It allows you to manipulate the video clip.

Transitions
Transitions are used to go from one clip to another clip. Once you place with them, you will quickly figure it out. The main ones you will use are the cross dissolve and fade to black.

Titles
Titles allow you to add titles to the front and back of your clip. You can place it in the middle or over clips if you want. Stay with the Basic template.

Exporting Footage:
You can export the file straight to Youtube or Vimeo you log in from iMovie. Each step below is the exact order you will go through to export your file.


Getting someone to Record your video
When I get to the theatre, if I can’t use my wife, I look to ask an employee of the theatre and or event space. Usually, someone young who is helping out but that you feel will have free hands after the end of the show. If it is not my wife, I always pay them $25 for their effort, and I've always been able to find someone who says yes. It's an easy $25 of 10 minutes of work. And no matter how good they perform for you, always pay them. Good karma always comes back around. If the theatre does not have a young person like a stagehand who can help you out, look around, and there will always be someone who will be kind enough to help you out.
You can ask a friend to show up at the end of the show. You can also ask stage managers, assistants who helped during the tech rehearsal but have nothing really to do during the performance and even friends of the producers and even coordinators who you chat up when you get there. If you are kind, respectful, and understanding of everyone's stress and needs, you will find someone to help out. I always have.
Yes, this does mean that you have to take on more roles during your show, but the more tasks you take on, the more you will grow as a producer, and the more opportunities you will present yourself. You need to not only perform your play, and you need to be the showrunner of your play.
How I direct them.
Tell whoever is helping you record these videos to keep the camera running when they begin filming and not to cut in between audience's reactions. Keep the camera angle on a wide-angle because you can zoom in later in post when you are cutting your trailer.
Put the camera on a Gorilla tripod or handheld tripod so that they can walk around and ask audience members for their thoughts after your performance. You don’t want the camera on a stationary tripod if you can avoid it.
You want whoever is helping you to move around quickly and efficiently as they are holding the camera on a gun. You don’t want to drag individual people to a camera that is on a stationary tripod. One it’s hard to get people to come to you, and second, it’s very intimidating for them. Most people are not comfortable talking to a camera pointed to them on a tripod.
Tell the person who is recording for you not to take it personnel when people tell them NO, that they don’t want to be recorded. It’s hard for us actors to understand, but speaking to a camera can be intimidating to the average person. If they say no, tell them to say thank you to them and to please move on to the next person. You only need four or five at the most to cut a compelling trailer.
The language I ask them to say to people is: “Excuse me would you mind sharing your quick thoughts if you LIKED the play? It helps us with the marketing of the show". The keyword here is "LIKED", because you want them to start talking they liked the play at the top of the video
Audio Tips
You can buy excellent soundtrack music to enhance your trailer and give it a more cinematic feel. You can purchase music from www.Audiojungle.com for around $15 to $30 per song.
Also, over the years, I have learned that have a microphone on your camcorder dramatically improves your audio when you get testimonials from audience members. A lot of times, the lobby’s are loud, and it can be tough to get good sound. You can buy a simple Rode external microphone that plugs straight into your Canon camera and latches on. Rode External Microphone.
Then What?
Once you export your trailer to your computer, upload it to Youtube and Vimeo so that you can share it with potential theatres and producers who might be interested in your play. A helpful link telling other theatres and producers how successful your play was recently is a great way to spark interest in your show and improve your chances of having your show booked.
You have to think about it from their end and have an understanding of the risk they are taking. It’s always a big risk for them to put their name and reputation on the line for you and your play, especially if it’s a new play. By creating a trailer for them, you are helping them, taking some of the guesswork out, and making the decision process easier for them.
Below are a few of my trailers. If you have any questions, you can email me or reach via my social media platforms. You can do this!
Instagram Profile Below


